User:Morganiq/Ceramics
Ceramic items become useful early in the game, and crafting them begins the progression from the Stone Age to the Bronze Age. Items of pottery (the jug and vessel) remain useful throughout the game, whereas molds used for casting tools and weapons are eventually superseded by smithing.
Ceramic items are initially crafted out of clay. These clay items are soft and useless until fired (heated at a high temperature) to harden them into ceramics. Firing is done in a pit kiln, an uncrafted structure built in the world.

Both soft clay and hard ceramic items may be placed on any solid block by sneaking (default: ⇧ Shift) and right-clicking while holding the item. Up to four items may be placed on a single block, one in each corner. Placed items float above the block and spin slowly, similar to a dropped item, except that they do not despawn. Item placing is useful for storing goods in vessels, and it is necessary to place unfired clay items in the pit kiln. To retrieve a placed item, "un-place" it by sneak-right-clicking it again. Multiple placed items in a single block may all be collected at once by breaking the block they're in.
Contents
Clay forming
Having found and harvested some clay, holding a stack of at least 5 clay items ![]() and right-clicking will bring up the clay forming interface, which works similarly to that of knapping. The major difference is that in the case of molds for tools and weapons, clay forming is the inverse of knapping: rather than clicking to remove unused material as done with a stone, molds are clicked to hollow out space where metal will be poured. (Pottery items are still formed by removing unused material.)
and right-clicking will bring up the clay forming interface, which works similarly to that of knapping. The major difference is that in the case of molds for tools and weapons, clay forming is the inverse of knapping: rather than clicking to remove unused material as done with a stone, molds are clicked to hollow out space where metal will be poured. (Pottery items are still formed by removing unused material.)
Note that unlike crafting, but like knapping, the material is consumed at the time the interface is brought up, not at the time an object is dragged out. This means 5 clay will always be consumed by the interface, whether or not a clay object was produced.
In the case of the knife, while two blades can be knapped from the same stone, only a single blade may be molded.
Pottery recipes
| Clay Jug | Clay Vessel | ||||||||||||||||||||||||||||||||||||||||||||||||||||||
|---|---|---|---|---|---|---|---|---|---|---|---|---|---|---|---|---|---|---|---|---|---|---|---|---|---|---|---|---|---|---|---|---|---|---|---|---|---|---|---|---|---|---|---|---|---|---|---|---|---|---|---|---|---|---|---|
|
|
Mold recipes
Unshaped mold
| Clay Mold | |||||||||||||||||||||||||||
|---|---|---|---|---|---|---|---|---|---|---|---|---|---|---|---|---|---|---|---|---|---|---|---|---|---|---|---|
|
Tool molds
| Axe Mold | Chisel Mold | Hammer Mold | |||||||||||||||||||||||||||||||||||||||||||||||||||||||||||||||||||||||||||||||||
|---|---|---|---|---|---|---|---|---|---|---|---|---|---|---|---|---|---|---|---|---|---|---|---|---|---|---|---|---|---|---|---|---|---|---|---|---|---|---|---|---|---|---|---|---|---|---|---|---|---|---|---|---|---|---|---|---|---|---|---|---|---|---|---|---|---|---|---|---|---|---|---|---|---|---|---|---|---|---|---|---|---|---|---|
|
|
|
| Hoe Mold | Knife Mold | Pickaxe Mold | |||||||||||||||||||||||||||||||||||||||||||||||||||||||||||||||||||||||||||||||||
|---|---|---|---|---|---|---|---|---|---|---|---|---|---|---|---|---|---|---|---|---|---|---|---|---|---|---|---|---|---|---|---|---|---|---|---|---|---|---|---|---|---|---|---|---|---|---|---|---|---|---|---|---|---|---|---|---|---|---|---|---|---|---|---|---|---|---|---|---|---|---|---|---|---|---|---|---|---|---|---|---|---|---|---|
|
|
|
| Prospector's Pick Mold | Saw Mold | Scythe Mold | |||||||||||||||||||||||||||||||||||||||||||||||||||||||||||||||||||||||||||||||||
|---|---|---|---|---|---|---|---|---|---|---|---|---|---|---|---|---|---|---|---|---|---|---|---|---|---|---|---|---|---|---|---|---|---|---|---|---|---|---|---|---|---|---|---|---|---|---|---|---|---|---|---|---|---|---|---|---|---|---|---|---|---|---|---|---|---|---|---|---|---|---|---|---|---|---|---|---|---|---|---|---|---|---|---|
|
|
|
| Shovel Mold | |||||||||||||||||||||||||||
|---|---|---|---|---|---|---|---|---|---|---|---|---|---|---|---|---|---|---|---|---|---|---|---|---|---|---|---|
|
Weapon molds
| Mace Mold | Javelin Mold | Sword Mold | |||||||||||||||||||||||||||||||||||||||||||||||||||||||||||||||||||||||||||||||||
|---|---|---|---|---|---|---|---|---|---|---|---|---|---|---|---|---|---|---|---|---|---|---|---|---|---|---|---|---|---|---|---|---|---|---|---|---|---|---|---|---|---|---|---|---|---|---|---|---|---|---|---|---|---|---|---|---|---|---|---|---|---|---|---|---|---|---|---|---|---|---|---|---|---|---|---|---|---|---|---|---|---|---|---|
|
|
|
Firing in the Pit Kiln
Clay objects are soft, and of no use until they are fired (heated at a high temperature) in a pit kiln to harden them into ceramics.
Required resources:
- 8 straw
- Straw is obtained by breaking 1-high grass blocks with a knife or scythe. It is also a byproduct of refining grains.
- 8 logs
- 1 firestarter or flint & steel
- up to 4 clay items to be fired
Building a pit kiln:
- Dig a 1-deep hole.
- Place up to 4 items you wish to fire into the hole.
- Items cannot be thrown; they must be placed by sneaking (default: ⇧ Shift) and right-clicking with the item in hand.
- Place 8 straw in the same block as the items to fire. The straw will fill the block to just below the top of the items.
- Straw must be placed by right-clicking only. Sneak-right-clicking will un-place items.
- Place 8 logs on top of the straw. The logs will fill the remaining space.
- As with straw, the logs must be placed by right-clicking only.
- Light the logs using a firestarter or flint & steel.
The pit kiln will burn for 8 hours. When the fire burns out, individual ceramic items may be un-placed by sneak-right-clicking, or the entire set of fired items may be collected in one step by breaking the block they're placed in.

|

|

|
| With items placed | With straw placed | With logs placed |

|

|

|
| With items placed | With straw placed | With logs placed |
| A fancy kiln done by AliceinGame | If you would like to make your kiln a bit fancier, instead of a dirt hole, try adding stone to spice things up. Note: The Pottery/Straw block must be surrounded by solid blocks on all sides. Chisel work can only be done above that block. |
Configuration
| Option | Default Value |
Description |
|---|---|---|
| general | Miscellaneous options. | |
| pitKilnBurnTime | 8 | The number of hours that the pit kiln should burn before being completed.
|
Using Ceramic Items
Each time you use a ceramic item there is a chance of it breaking. The percentage is different for each type of item. When the item breaks, it will make a distinct sound.
Ceramic items may be placed on top of blocks and retrieved from them in the same manner as described above for unfired clay items.
 Ceramic Jug
The Ceramic Jug is used to carry water. It can be filled by right-clicking it into a block of standing fresh water. Flowing water and salt water will not work. You can drink from a jug of water by holding down the right mouse button, the same as you would when eating food. Drinking will replenish three bars of thirst and completely empty the jug. There is a very small chance that the jug will break on use.
 Ceramic Vessel
The ceramic vessel is one of the most versatile ceramic items. It has many uses; storage, smelting, metallurgy and casting.
Storage
A Ceramic Vessel can be used to store up to four stacks of items. The items must have a size of small, very small or tiny.
To place items into a vessel, right-click with the vessel in hand to open up its GUI. You can use the GUI to transfer items between the vessel and your inventory, in the same manner as you would with a Chest.
A Ceramic Vessel with items in it can still be stored in your inventory, in a Chest or placed on the ground, thereby providing increased storage capacity. Note: Food stored inside of a vessel will decay at 50% the normal rate.
Smelting Ore
Note: The Vessel can only smelt ores. If you have turned your metals into ingots, you will need to heat them in a forge to liquefy them, or use a Crucible if you plan on making alloys.
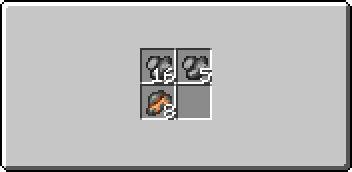
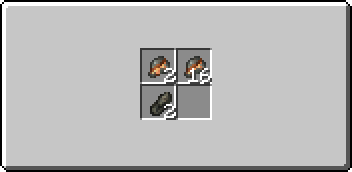
A Ceramic Vessel can be used to smelt Native Copper, Tetrahedrite and Malachite ores into pure molten copper metal. To do this, fill the vessel with ore (stacks of different ores may be placed together in the same vessel) and then fire it in a kiln.
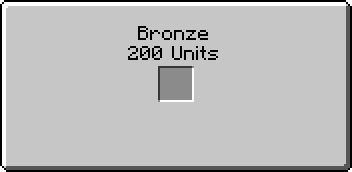
After the firing, retrieve the vessel from the kiln and right-click it to open up its GUI. You will see that now instead of the usual four slots the vessel has only one and contains text describing the amount of metal it contains. This metal will remain liquid for about 10 Minecraft hours, starting after the firing completes. If the metal inside solidifies, you must fire it in a pit kiln again to re-melt it. Note: Vessels with molten metal inside will have a white, "Liquid" tooltip on them.
Once the metal has been completely drained from a vessel its GUI will revert to the normal four slots for storage the next time you open it.
A vessel containing molten metal can be placed or stored like a normal vessel.
Metallurgy
A Ceramic Vessel can also be used to create Bronze, Black Bronze and Bismuth Bronze.
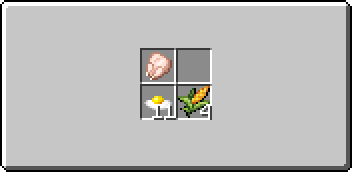
Before Firing: Place the necessary ores into a Ceramic Vessel, in the proper proportions for the desired type of bronze. For example, if you wanted to create normal Bronze then you would put copper ore (any combination of Native Copper, Malachite or Tetrahedrite) and Cassiterite into the vessel. For each alloy there is a range of proportions which will produce the desired alloy so you don't have to hit an exact percentage, just be within the range.
After Firing: If you got the proportions right then when you right-click the vessel it will open up the same single-slot GUI as described above for smelting pure ores. You can then transfer the molten bronze metal to a Ceramic Mold in the same way. If you got the proportions wrong then when you right-click the vessel you'll get the four-slot storage GUI showing the raw ores still sitting in the vessel, unchanged.
Casting
Ceramic tool and weapon molds can be filled directly from a vessel containg Copper, Bronze, Black Bronze or Bismuth Bronze.
All the recipes for tool and weapon molds can be found at the Clay Tool Molds page. ![]()
Place an empty or partially filled Ceramic Tool, Weapon, or Ingot Mold into the slot to fill it with metal from the vessel. It takes 100 units of metal to completely fill an empty Ceramic Mold. The text in the vessel's GUI will be updated to show the amount of metal remaining in the vessel.
 Ceramic Mold
Ceramic Molds can be used to transfer molten metal from a Ceramic Vessel to a ceramic tool or weapon mold, and to create Ingots.
Casting
While the full ceramic mold is at liquid temperature, right click with it in your hand to open the casting GUI. You will see an arrow with one slot to its left and two to its right. The leftmost slot will contain the filled mold. Place a single empty tool or weapon mold into the first slot on the right to begin the transfer. Once the transfer is complete the tool mold will move into the output slot and will show itself filled with metal.
Retrieve the filled tool mold and the now-empty Ceramic Mold from the slots on the left. There is a chance that the Ceramic Ingot Mold will be broken and lost during this process.
Once the mold is full, place it into your crafting area and retrieve the finished tool or weapon head from the output. The mold will be destroyed in the process.
|
|
Combining
The casting interface can also be used to combine partially filled liquid unshaped metals. While both partially filled molds are at liquid temperature, right click with one in your hand to open the casting GUI. You will see an arrow with one slot to its left and two to its right. The leftmost slot will contain the clicked partially filled mold. Place the second partially filled mold into the first slot on the right to begin the transfer. If the combination of the two partially filled molds contains more units than a single mold can hold, the transfer will simply stop when the second mold is full, leaving any remaining metal in the first mold.
Ingots
A Ceramic Mold which is filled with metal can also be used to create an ingot. Simply place the filled mold in your crafting area and retrieve the ingot from the output. The empty mold will be returned to your inventory although there is a chance of it breaking and being lost.
Creating an ingot in this way will only work if the metal is in a solid state. The temperature will be carried over from the unshaped ingot temperature.
| | |||
| | |||
| | |||
| Navigation | |
|---|---|
| Construction | Barrels • Blueprints • Bricks • Firepit • Plank Blocks • Protection Meter • Quern • Smooth Stone • Straw & Hide Bed • Support Beams • Thatch |
| Environment | Altitude • The Player • Calendar • Cobblestone • Logs • Mobs • Saplings • Seasons • Stone • Temperature • Trees |
| Food | Agriculture • Animal Husbandry • Berries • Fruit Trees |
| Materials | Charcoal • Coal • Double Ingots • Double Sheets • Flux • Gems • Gunpowder • Hides • Ingots • Leather • Lumber • Minerals • Pottery • Redstone/Powders • Sheets • Sticks • Straw • Unshaped Metal • Wool |
| Metalworking | Alloys • Anvils • Armor • Bellows • Blast Furnace • Bloomery • Tool Molds • Crucible • Forge • Gold Pan • Metals • Ores • Sluice |
| Tools & Weapons | Arrows • Axe • Buckets • Chisel • Firestarter • Flint & Steel • Hammer • Hoe • Javelin • Knife • Mace • Pickaxe • Prospector's Pick • Saw • Shovel • Sword • Scythe • Shears • Spindle |
| Other | Crafting Differences • Item Index |
Bismuth Bronze, Black Bronze, Bronze and Copper tools can be made by making clay tool molds corresponding to each tool, firing them in a pit kiln, and casting metal into them.
These molds are created using an interface similar to knapping. To open this interface, you must right-click with a stack of 5 or more clay.
Note: Some of these molds may have slightly different patterns; moving the entire pattern 1 block left, right, up , or down. However it is important to keep the outer border intact whenever possible.